
A few years ago we found an old steamer trunk in the ally behind my apartment in Chicago and had to move with it twice. It is in good shape and is quite pretty so we held onto it. The last two spaces did not really have room for it so it collected dust in the garage and basement. Now we finally have room to put it at the end of a bed, but just sitting it on the ground looks a bit unfinished.
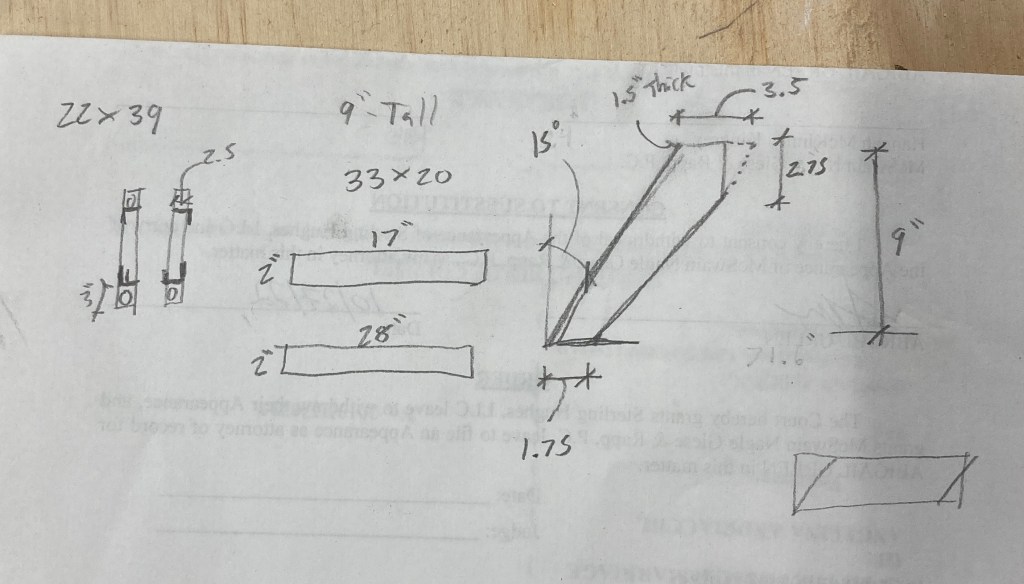
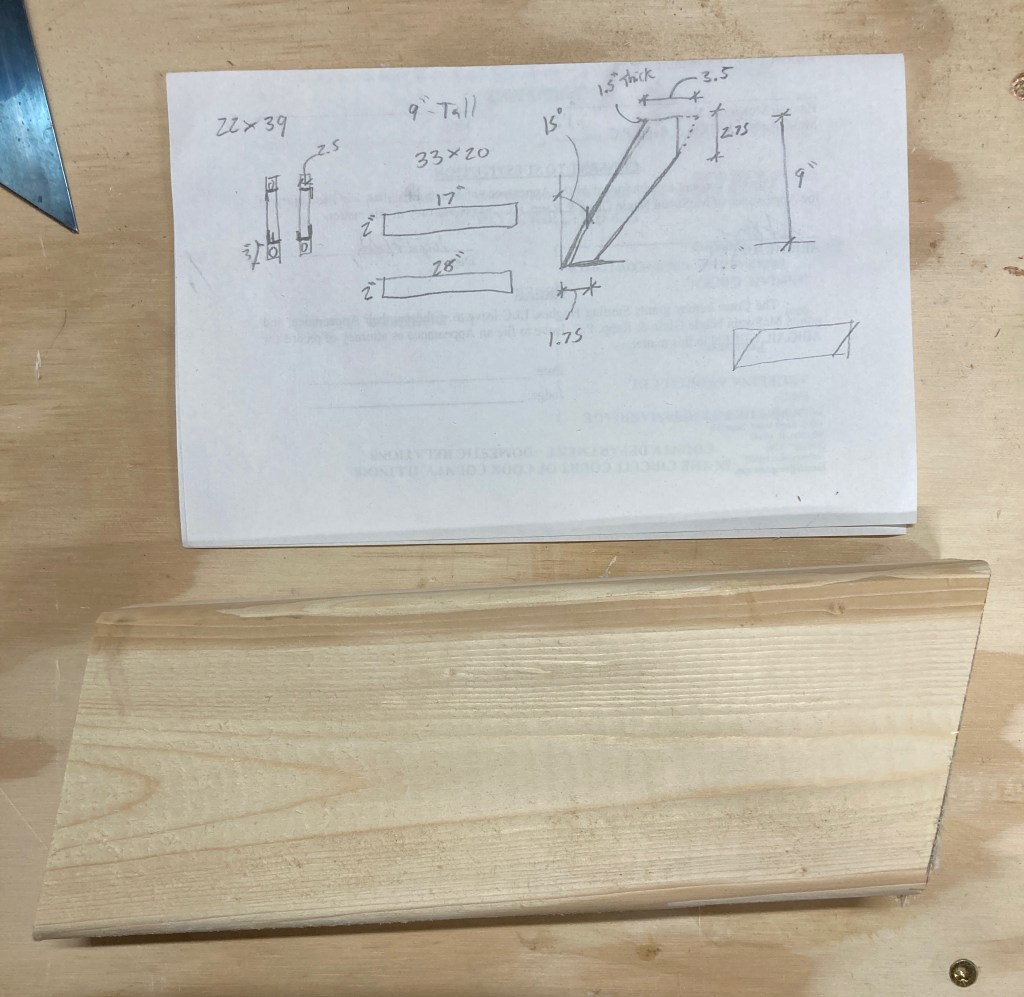
I know when I see other people post projects I love seeing their process sketches or detail drawings so I dug through piles of paper to find the sketch I did for these legs. This of course makes me want to go on a tangent about sketches and my specific process. For as long as I can remember I have wanted one perfect sketchbook to be attached to my hip ready at all times with the perfect pen or pencil neatly clipped on it. Every year I try to find it and every year I buy a something similar to a moleskine or leuchturm with a grid or dot pattern and stare at it blankly nervous to mess up that first page. So I start on the third page and start writing mundane notes and measurements. I use it for a few weeks and usually misplace it for weeks at a time. Anyway, this is why my sketch for these legs is on the back of some document that was on my desk probably for some important reason I forgot about now that it has moved to my shop.
So, my ideal tidy sketchbook is probably never going to happen. I am who I am. So….what is my process? Usually, my sketches end up as doodles on the side of meeting notes, on the back of envelopes, or if I’m lucky in a gridded composition book. I prefer using “thick” fine-liner pens, but usually settle for nearest partially working ballpoint pen or mechanical pencil.
In one of my tidy sketchbook shopping routines I picked up a 3 pack of Graphik Line Makers and they became my favorite pens. I have had the same set for over 5 years and miraculously have not lost them or run out of ink. They are not always where I want them, but when they are handy, they are my choice pens. As you can see from the photo below my 0.1 looks brand new and my 0.5 has the label worn off with use. Hence why I say I prefer thick fine-liners.

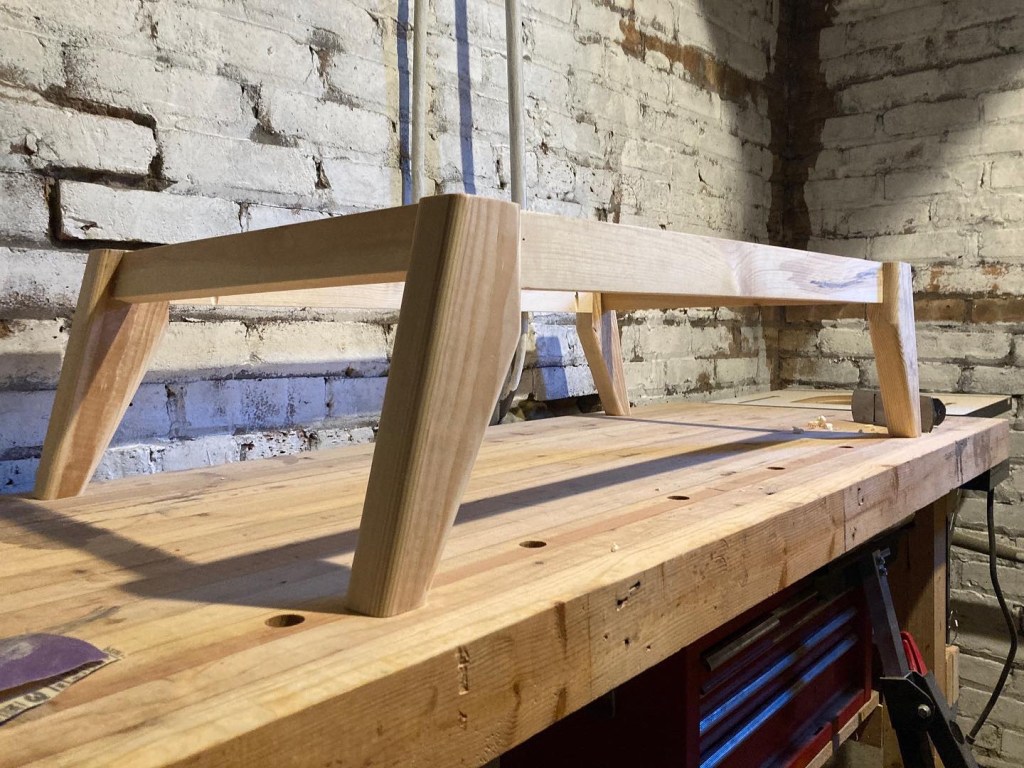
Back to the legs. So I have had a project stewing in the back of my mind for a dresser / record player stand and I already had a vision for the legs. I figured I would test them on this trunk base. 9 inches seemed like the right height for the lift so I cut a 15 degree angle on a two by four and measured 9 inches perpendicular to that cut and marked another 15 degree cut.
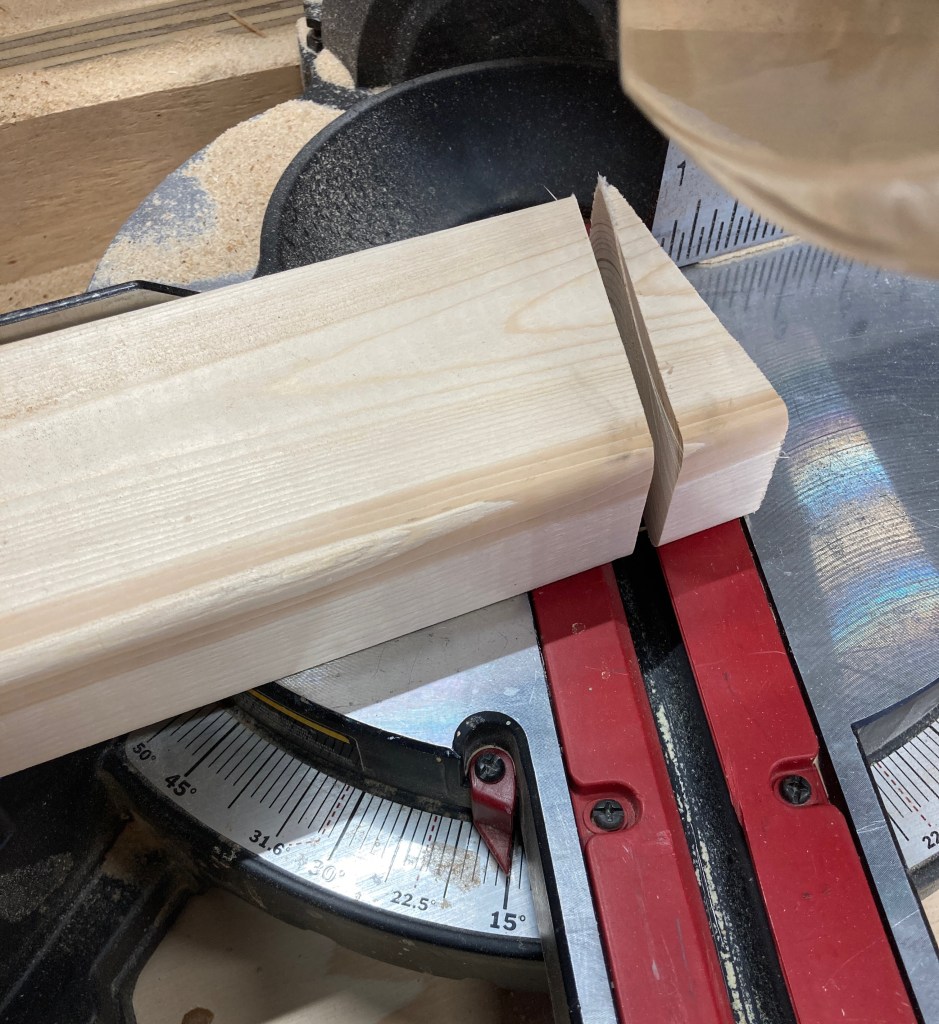


Here I used a 15 degree cut off to set the angle and butted it up to a stop on a table saw sled. I plan to make a larger sled and will document that process. My new sled will include some track to install hold down clamps to make this process easier and safer. I just pushed against the stop and a lot of downward pressure, but that is not really recommended. I did the same thing for the other angle cut.

Rough leg complete. You can stop here and start sanding or you could round over the sharp edges with a router. I’m using my sliding bevel gauge to hold up the leg. This is one of my favorite tools. My partner calls it my pirate tool. I guess it looks old and steampunk. It is great for matching odd angles and no math required.
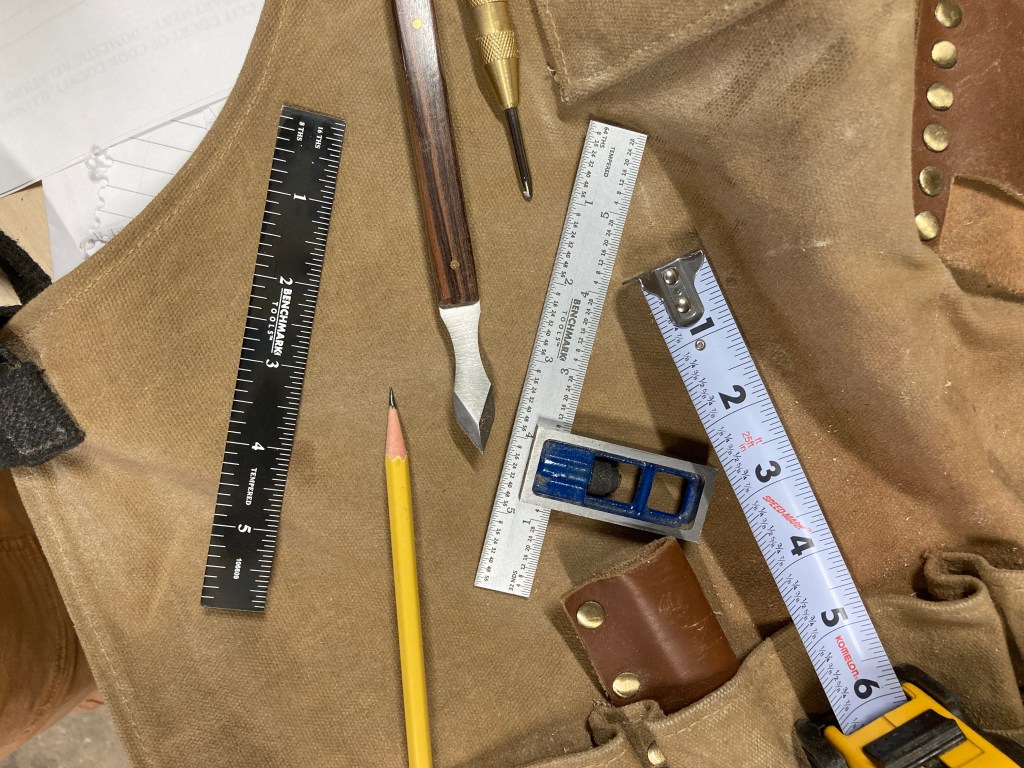
Other measuring and marking tools I use almost constantly. I got the shop apron for Christmas and had to buy a marking knife to go in the leather holder. I did not even know I needed it, but now I use it all the time. The double square goes in the other leather holster.

Gotta keep this pencils sharp. I saw someone else’s shop photo had a pencil sharpener in front of their miter saw and immediately moved mine here. Center of the shop and not in the way because it is under the handle. I wish I had an old school one that hung straight up and down.

Distracted again. Back to the legs. Drilling the holes for dowels.

Skirt doweled and glued to legs.
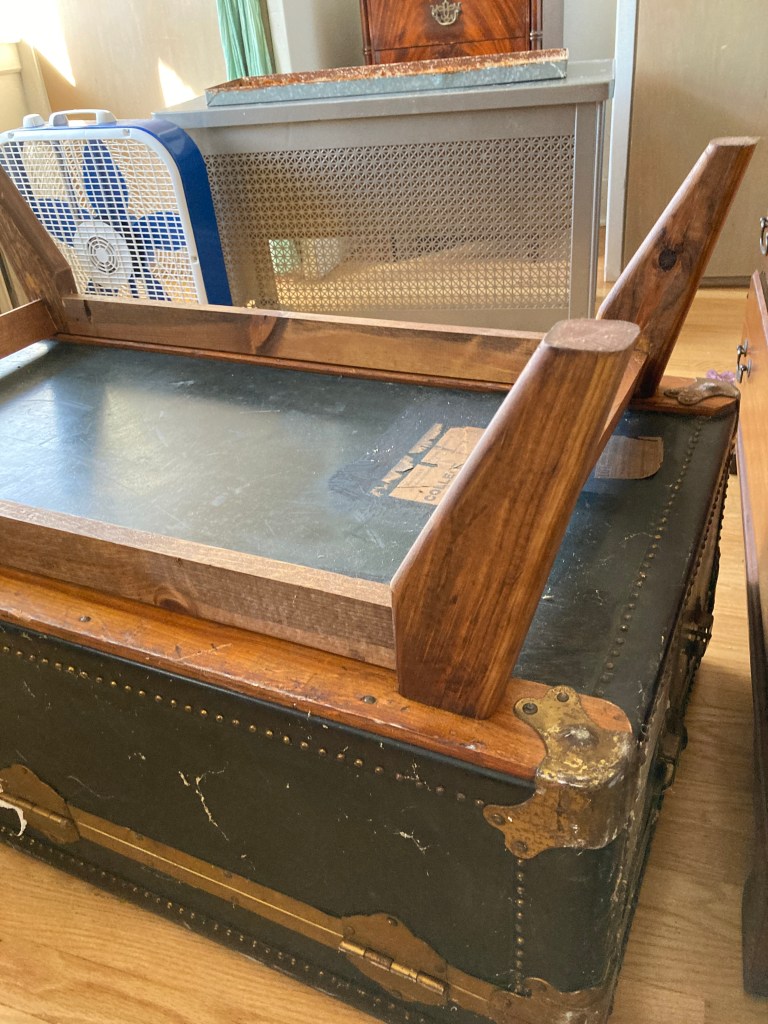
Stained and attached to bottom of trunk with pocket screws.


Leave a comment